Let's Get Started with your Photo Restoration !
I know you're eager to start enjoying and sharing your personal photos with others through our copy and restoration services. Which is the best way for you to get them to us is up to you. Click on the tabs below for more information
Ideally, bringing in your photos for us to evaluate would be the best way to get started on your copy or restoration services. This way we can talk about what you are looking to accomplish for the final outcome. Whether it's just a digital scan, a scan and print, or full restoration, we want to help. We can also show you the many presentation options such as matting and framing of your pieces. We are a full service studio from start to finish!
-
Give Us a Call!
- to schedule an appointment to meet
-
781-826-8189
We'll answer as Susan White Photography, our parent company - Our Studio Address Is
21 Kallio Path
Pembroke, MA 02359
Click for Directions
 Mail Your Photo
You can send your original photo by certified Mail/Fed-Ex/UPS in a protective envelope and send it to us. Your original will be returned with your restored photo.
-
STEP 1
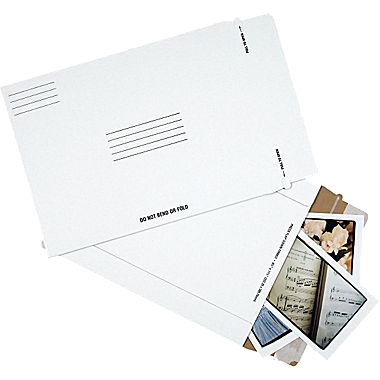
Suggestions for packaging for mailing or courier
-
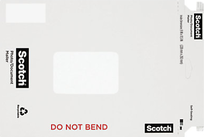
- Place your photo between two sheets of stout cardboard, allowing some overlap of the cardboard. Tape the edges - being careful not to tape the photograph. Place the cardboard/photo sandwich in a dedicated photo/document mailer - like the kind US Post or Scotch sells. We have not had any issues with US Post or the major private couriers but responsibility for loss rests with you. You should only choose the method of delivery security that makes the most sense to you and where possible create a digital backup before sending.
-
STEP 2
Fill out the Form Below
- This will give us a "heads up" that your package is on the way!
-
STEP 3
Mail Your Package To
-
PhotoRestorationMA
21 Kallio Path
Pembroke, MA 02359
 Upload Your Photo
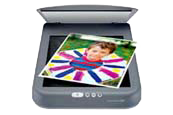
Upload Your Photo Now! Have your photo scanned at 300-600 dpi (dots per inch) or higher. You can also take your photo to Staples and they will scan it for you.
If I am going to scan - what settings should I use?
We recommend always scanning your photo larger than you may presently need. For slides and negatives, at least 2400dpi. For small photographs (< 4" x 6") use at least 720 dpi; for 6" x 4" or 5" x 7" use at least 600 dpi; for images larger than 5" x 7" use at least 400 dpi. Higher is always better and always scan in color and with the "photo" setting.-
Dust to Dust
- First wash and dry your hands (even better, put on cotton gloves). Oils left on original photos can degrade them over time - and will leave prints on your scanner glass . It's always best to give the glass a wipe with a cloth and Windex or isopropyl alcohol. If you have a can of air - blow the dust off the glass too. And check the photo for dust while you are at it. OK. The glass is safely dry and the photo is back on. Go to your computer and poke around and find your "settings" or "preferences" tab. There are really only three setting that you need to worry about and they are: resolution - or dots per inch (or "dpi"); "photo or document"; and "color or black and white". Resolution matters most in scanning because dpi sets both the quality and size of your image - see more below. Always choose "photo" (not "document") and always check "color" - even if you are scanning a black and white image. Lastly, choose your file path so you can find the scans when you are done, and output to JPEG, best quality.
-
Best Scanner Resolution for Printing
- Your scanner should have a setting for "resolution" and it should give you some choices either in dpi ("dots per inch") or ppi ("pixels per inch") - for all practical purposes they are the same thing. Your choice - depending on your scanner - will be something between 50 and 10,000 dpi. Scanning at 300 dpi will give you an image that can be printed at the same size as the original. Can't do better than that can we? Actually, we can. Very often, there is a lot more detail in a photograph than we can see with the naked eye. So it almost always pays to scan at higher than 300 dpi. In our work here, we scan at a minimum of 600 dpi which means that an image can be made twice the size of the original. If you are certain that you only want something as big as the original, then scan at 400 dpi. That's bigger than the original but gives you some margin if you want to crop off a border or a ragged edge.
-
Resolution for Negatives and Slides
- A stand alone scanner will have a frame that allows you to scan negatives and slides. (You will need to take the white top plate off your scanner lid for this exercise.) Make sure the settings are set for negative film or positive film (slides). Take special care with dust on the glass and on the film then scan at a minimum of 2400 dpi. If you have the patience, choose 4800 dpi.
Scanning documents
- Documents can generally be scanned at a maximum of 300 dpi. Seldom do we have the need to enlarge a document and usually they are just a matter of record. Your scanner should have a "document" setting. If you plan to frame the document or enlarge it then treat it like a photograph. If you just need to send it to your accountant then 150 dpi should suffice.
Why scan B&W photos in color?
- First of all, few images that appear to be black and white are actually devoid of color. Most have a slight, natural tint. Second, scanning images in color means that three color channels are created - Red, Green and Blue - and this is important should you ever wish to repair the photo or restore it since much of the work is done on these channels separately. In addition, many of the most sophisticated adjustment and restoration tools require an image with all three color channels. And, sure you have a smaller file size with a black and white photo scan - but these days, disk space is really no longer an issue.